리벳[Rivet]
반응형
[본문의 출처는:http://www.overclock.net/case-mods-general-discussion/337343-how-rivets-removing-replacing.html]
I've seen a few posts on what they are, how you remove them, replace them, etc around the past week or so so heres a quick little post on rivets guys. Hope this helps anyone wanting (or thinking about) taking their case apart or affixing new peices. This post was taken and tweaked from my current build log. Hope this is helpful to someone! 
First, a rivet before it is used and how it works.
These are the rivets you'll find in PC cases, pop-rivets. (In this picture) the top part above the 'head' is the actual rivet. The long piece behind that is what the rivet gun clamps onto. It pulls this rod down (or up, however you look at it) to the 'head' The end of the rod is larger than the sleeve of the rivet, thus making it buldge or split as the rod is pulled. This swells the rivet larger than the hole and holds the pieces you are riveting together. I found a good .gif of this. With the rivet gun.
Here you can see a rivet gun and the rivet. It pulls the rod into the 'sleeve' of the rivet and pulls the pieces tight. Once the rivet is tight the end of the rob breaks off and you are left with what you see on your case.

Just a quick cut-away of the used rivet.
So thats what is left. Just the top of the rivet and the bulged out bottom.
Removing rivets
To take a rivet off you simply find a drill bit a little larger than the hole in the head. All you are actually doing is drilling the head of the rivet off, thus in turn the back falls of and the pieces you are de-riveting is free.
Here you can see me drilling the head out. Also on the bit is a previously drilled rivet head. Don't worry, they always stick on the drill-bit like that,lol. Just take a pair are pliers, grip the leftover heads, and reverse the drill. Nice clean bit again!

Now we've drilled through the head and the bit actually (generally will) push the back half of the rivet off.
One clean hole ready for a new rivet!

And here is a rivet gun and rivet. Just put the new rivet in the hole, slide the gun over the top (the rod that sticks out) and clamp the handle down. You'll probably have to clamp it twice, just let the handle go, slide the gun down again, and regrip the handle. The gun has a pair of 'teeth' in the top and grips the rod and pulls it, thats how it works.

First, a rivet before it is used and how it works.
These are the rivets you'll find in PC cases, pop-rivets. (In this picture) the top part above the 'head' is the actual rivet. The long piece behind that is what the rivet gun clamps onto. It pulls this rod down (or up, however you look at it) to the 'head' The end of the rod is larger than the sleeve of the rivet, thus making it buldge or split as the rod is pulled. This swells the rivet larger than the hole and holds the pieces you are riveting together. I found a good .gif of this. With the rivet gun.
Here you can see a rivet gun and the rivet. It pulls the rod into the 'sleeve' of the rivet and pulls the pieces tight. Once the rivet is tight the end of the rob breaks off and you are left with what you see on your case.
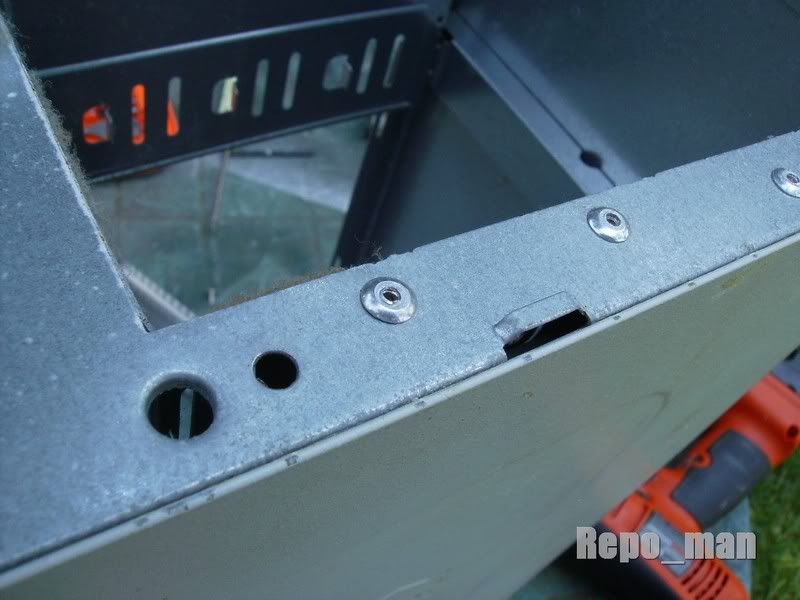
Just a quick cut-away of the used rivet.
| This image has been resized. Click this bar to view the full image. The original image dimensions are 800x600 and 84KB in size. |
So thats what is left. Just the top of the rivet and the bulged out bottom.
Removing rivets
To take a rivet off you simply find a drill bit a little larger than the hole in the head. All you are actually doing is drilling the head of the rivet off, thus in turn the back falls of and the pieces you are de-riveting is free.
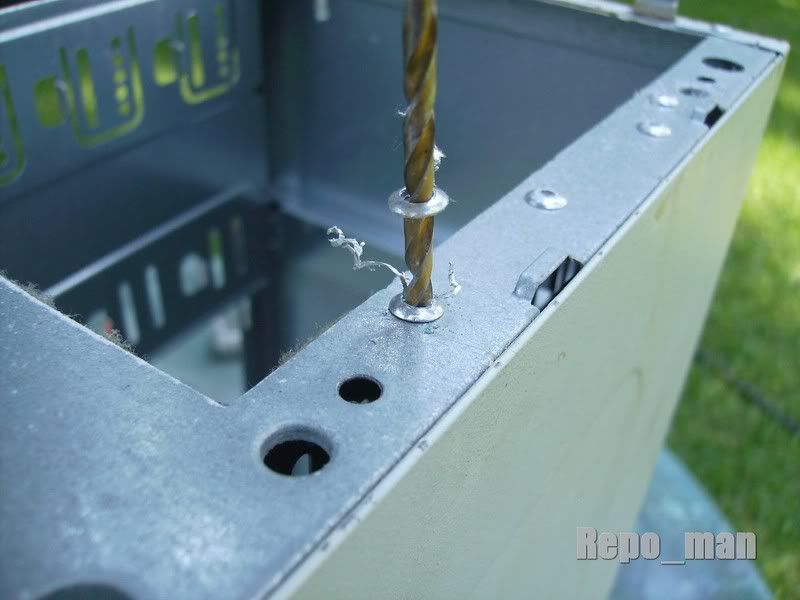
| This image has been resized. Click this bar to view the full image. The original image dimensions are 800x600 and 73KB in size. |
Here you can see me drilling the head out. Also on the bit is a previously drilled rivet head. Don't worry, they always stick on the drill-bit like that,lol. Just take a pair are pliers, grip the leftover heads, and reverse the drill. Nice clean bit again!
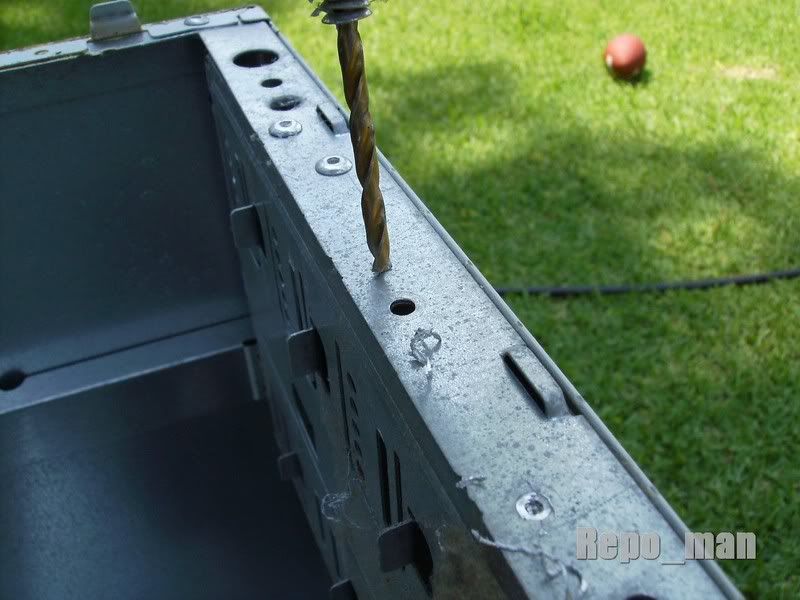
| This image has been resized. Click this bar to view the full image. The original image dimensions are 800x600 and 80KB in size. |
Now we've drilled through the head and the bit actually (generally will) push the back half of the rivet off.
| This image has been resized. Click this bar to view the full image. The original image dimensions are 800x600 and 99KB in size. |
One clean hole ready for a new rivet!
| This image has been resized. Click this bar to view the full image. The original image dimensions are 800x600 and 156KB in size. |
And here is a rivet gun and rivet. Just put the new rivet in the hole, slide the gun over the top (the rod that sticks out) and clamp the handle down. You'll probably have to clamp it twice, just let the handle go, slide the gun down again, and regrip the handle. The gun has a pair of 'teeth' in the top and grips the rod and pulls it, thats how it works.
마지막에 광고도 빼놓지않고!
And if you don't have a tivet gun and want to grab one for yourself and your future modding, pop-rivet gun kits can be purchased from McMaster-Carr from $34.74 USD with a 200 piece assortment of rivets at http://www.mcmaster.com/ search for item number 6659A23 
반응형
'AVIATION > 부품&공구' 카테고리의 다른 글
| Aircraft Cable 사이즈 (0) | 2011.06.20 |
|---|---|
| [항공 지상 장비]GPU/APU (2) | 2011.05.03 |
| 비트(bit),소켓(Socket)&홀더(holder) (0) | 2011.02.14 |
| 공구소개 (0) | 2011.02.13 |
| Safety Wiring 방법 (0) | 2011.01.28 |


댓글